
I've been taking pictures as we go, not only for blogging, but because I think it will be so neat to look back in 30 years and see what we were able to accomplish. (And trigger memories of the process).
If we end up having a housewarming party, it'll be fun to have a photo album out showing the work we've been able to do on our home.
I'm warning you now. This post is a lengthy one! So let's get to it. Here's your first tour of our new home. Consider this post the "befores" in every single room....yes, lots to do. So we'll stick to the basics today, and I'll be doing more specific posts with lists of our plans over the next few weeks.
Front Yard


We have our work cutout for us in the yard! I envision myself enjoying coffee or wine out on this little front porch (as mentioned here). But with everything else to take care of, landscaping will be year 2. We'll maintain for now, but I have no plans to make the outdoor space anything great immediately.
Back Yard


Can you see how high the grass was?! It was pretty crazy. J ended up mowing without a bagger the first time because it was filling up way too quickly. Tucker loved it though. He was literally rolling around in the long grass, it was hysterical.
Our biggest projects for the backyard will be refacing the deck and maintaining the pool. But hopefully we can incorporate some of these ideas too.
Kitchen


(listing photos)
The kitchen is the first thing you see when you walk in the front door. And as you can see from these pictures, it's also the exit out to the deck. Like many homes, it's the command zone. Our biggest priority in the kitchen right now is getting bar stools. It's hard to tell from these photos (maybe just to me) but the breakfast bar is massive and can definitely fit more than 3 stools. We're planning to purchase 4 once we find ones we love that won't also break the bank.
Dining Room

If you stand at the island in the kitchen and look straight ahead, the dining room is in front of you, to the left. And the front door is straight ahead to the right. The dining room was pretty much the landing pad at first. We weren't getting our dining room table right away so there was no reason not to fill this space with boxes as we moved in.
Then, it became the living room while we cleaned the carpet in the family room.

And today it looks like this:

More details to come but how awesome is this dining room set J found?! We have so many plans for it. And will share details as we go of course!
Family Room
 Above is the listing photo, below is how it originally looked when we moved in...

Crazy, I know. But don't worry, we've made progress since these shots. First, we emptied the space to clean the carpet -

And since then, we've setup a family room with the furniture we own. Sadly, our sectional from the condo doesnt' fit perfectly in this room but we will definitely be making it work for now.
Living Room

Above is the listing photo, below is how we used the space for the first few nights here.


I cannot thank our moms enough. It was such a long, ridiculously hot day when we moved in. One of those days where you don't realize how exhausted you are until you sit down. The moms were determined to setup our "bedroom" before they left for the night. Do you know how comforting it was to walk in and see this. The night stands and lamps were a nice touch ladies.
Here's what it looks like today now that we've moved upstairs:


Office

J finally has a home office! For someone who works from home when not out at clients, J has patiently waited for this day. A home office. And funny enough, there's an extra desk for me too! Above is a listing photo and below is a photo I snagged in the morning (J had no idea).

Guest Rooms


The top two photos are of what we are calling/furnishing as a guest room. And the bottom two are of our spare room, as we're calling it. My plan is to fill it with workout equipment - yoga mat, light weights - since we've decided to hold off on gym memberships for now. Eventually, it will be a nursery. Eventually as in not in the near future. Calm down. :)
Guest Bath


Have you ever seen a more beautiful bathroom?! Oh my g, we cannot wait to tear this out. It's not even that it's dated, it's that it's grimy! We've cloroxed this sucker and are being patient for now. There are a few major projects before this badboy. One being the deck, and two being the master bathroom. But once those projects are done, we'll be incorporating some of these ideas into this space.
Master Bath


Oh, you couldn't tell that this is a bathroom? I am actually really excited that we have a clean slate for this project. Just like having new floors installed, it actually makes it easier to be given a blank page. There is no demo to be done. There is no unforeseen circumstances that tend to come up when a bathtub is removed. We've decided to get this bathroom done first so that when we demo the guest bathroom, there is a fully functioning bathroom to use.
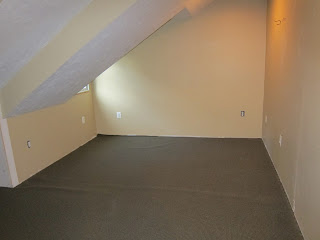
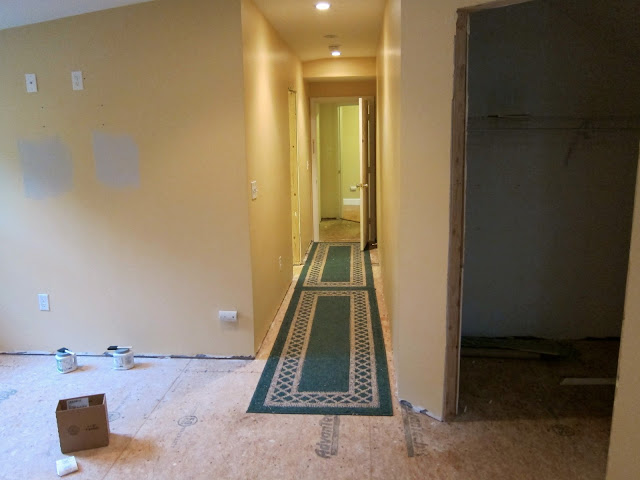
Master Bedroom


1- The hallway leading into the bedroom. The bedroom door is behind me, my closet is the unfinished door on the left (it's a pocket door!) / 2 - My closet, eee! :)


3 - View once you get to the end of the hallway / 4 - view to the left from the end of the hallway, unfinished space on the left is J's closet.


6 - J's closet / 7 - view from the back corner of the room
8 - view from the bedroom looking down the hallway
Although we've started making this house our home already, I wanted to make sure you saw what we started with. I didn't lie when I said we have our work cut out for us. Which paint do you think we chose in the photo above? Left or right?
Any advice you can give on finishing spaces?? Like I mentioned above, it is a bit overwhelming. And expensive! I'm doing my best to look for deals and only splurge on things we really want and are timeless (like hardwood floors). So you may see a few Ikea hacks over here! And I welcome any and all advice from those of you who've already gone through this process.
If you like this post please let me know by leaving a comment or liking my Facebook page. You can also follow along on Twitter, Pinterest, and Instagram. Let's stay in touch!

Oh it's so pretty! Can't wait to see what you do with it!
ReplyDeletecan't wait to follow along on all the updates!
ReplyDeleteSo pretty! I'm excited to see the follow-up pics too :)
ReplyDelete